Computer-Vision Phase Shift and Peak Matching - Automating Alignment Across Large Sample Sets
What's New in 2026
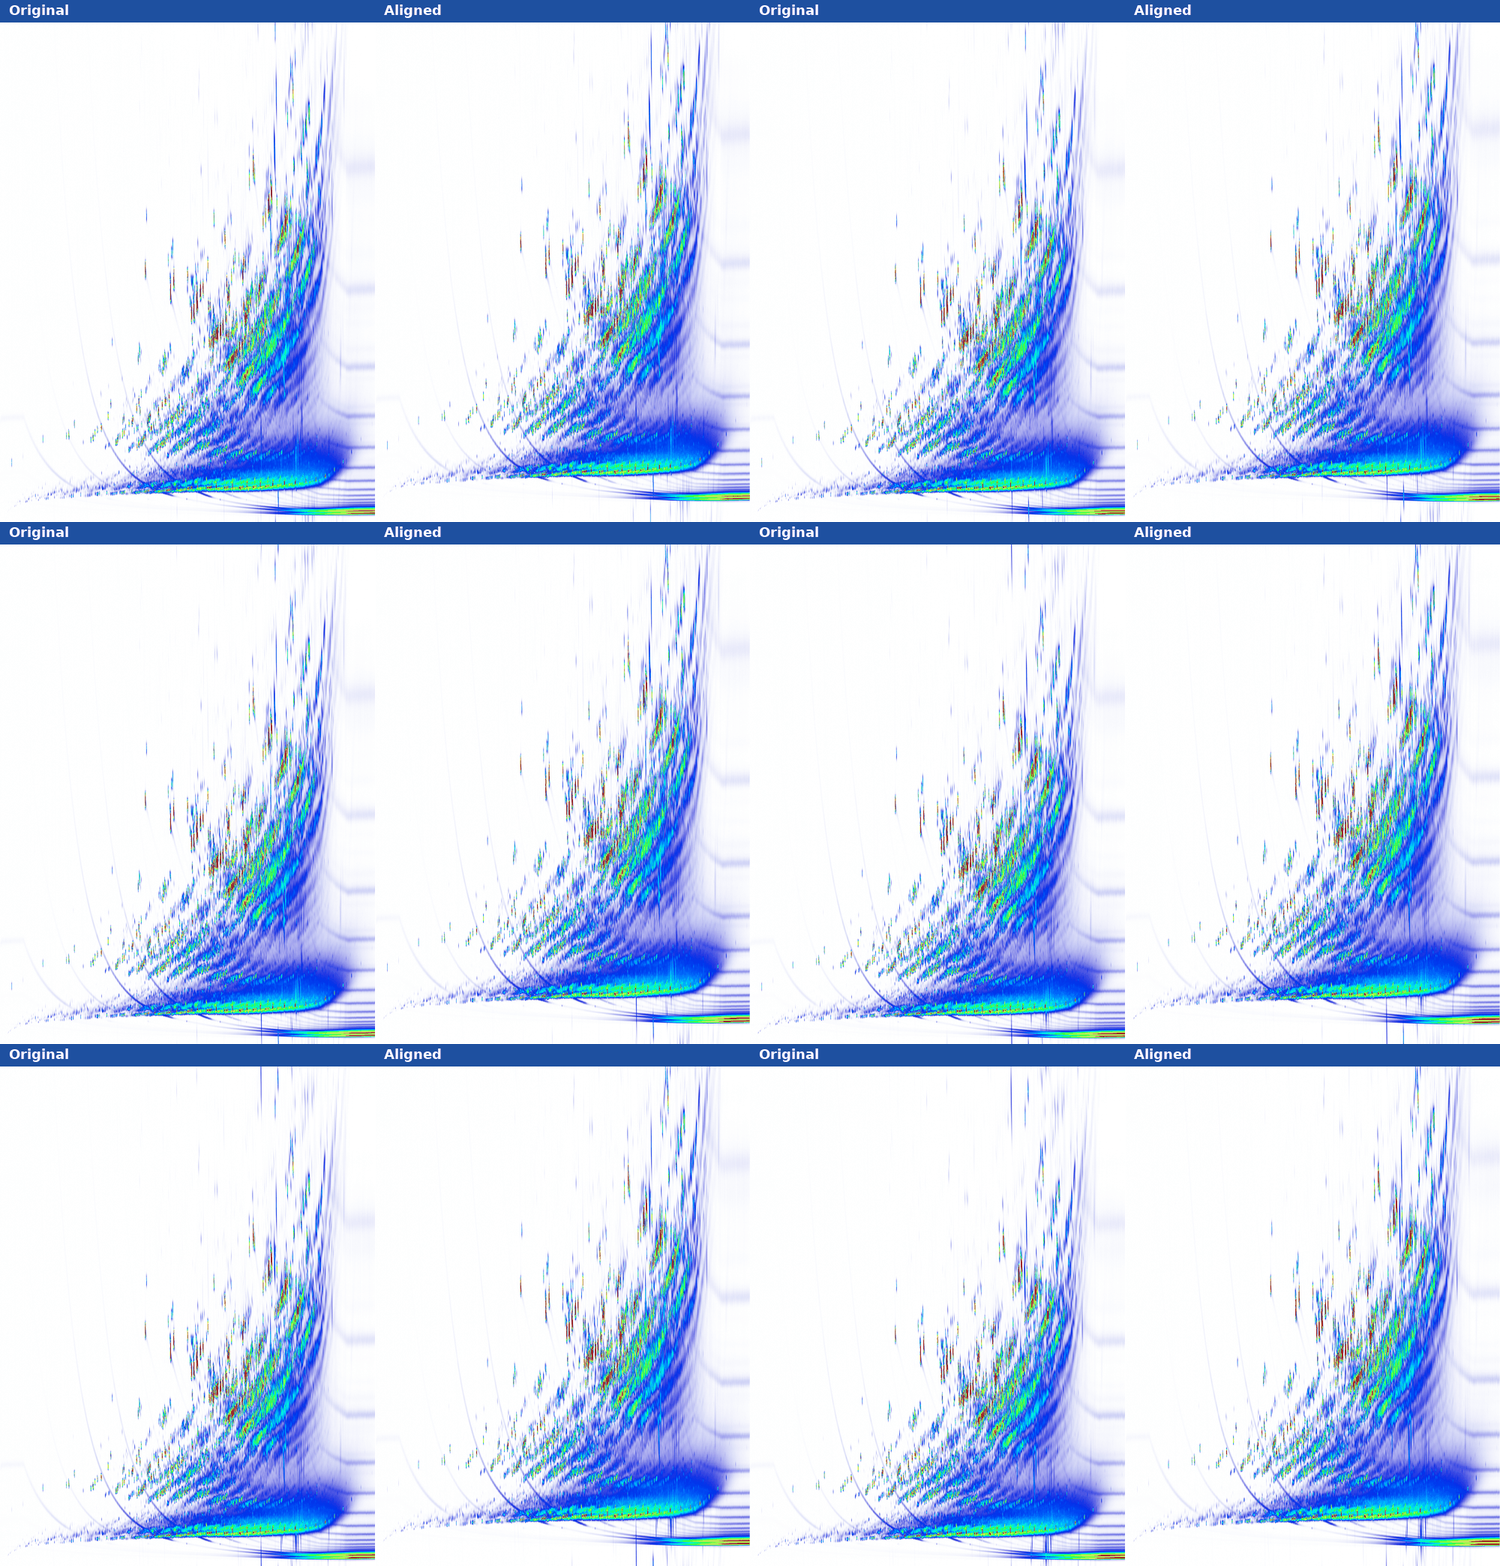
Version 2026 introduces computer-vision shift and peak matching - two new tools that use image recognition to automatically bring chromatograms into phase and match template peaks to a reference image. Together they take the repetitive manual work out of aligning and re-matching large sets of runs, even when retention times drift.
Why Alignment Matters
Routine analysis, such as ASTM D8396 and UOP 990, depends on group-type assignments that are stored in templates so they do not have to be recreated for every run. Retention-time variation breaks that reuse and forces analysts to adjust templates by hand, run after run.
Version 2026 addresses the two most common sources of misalignment:
-
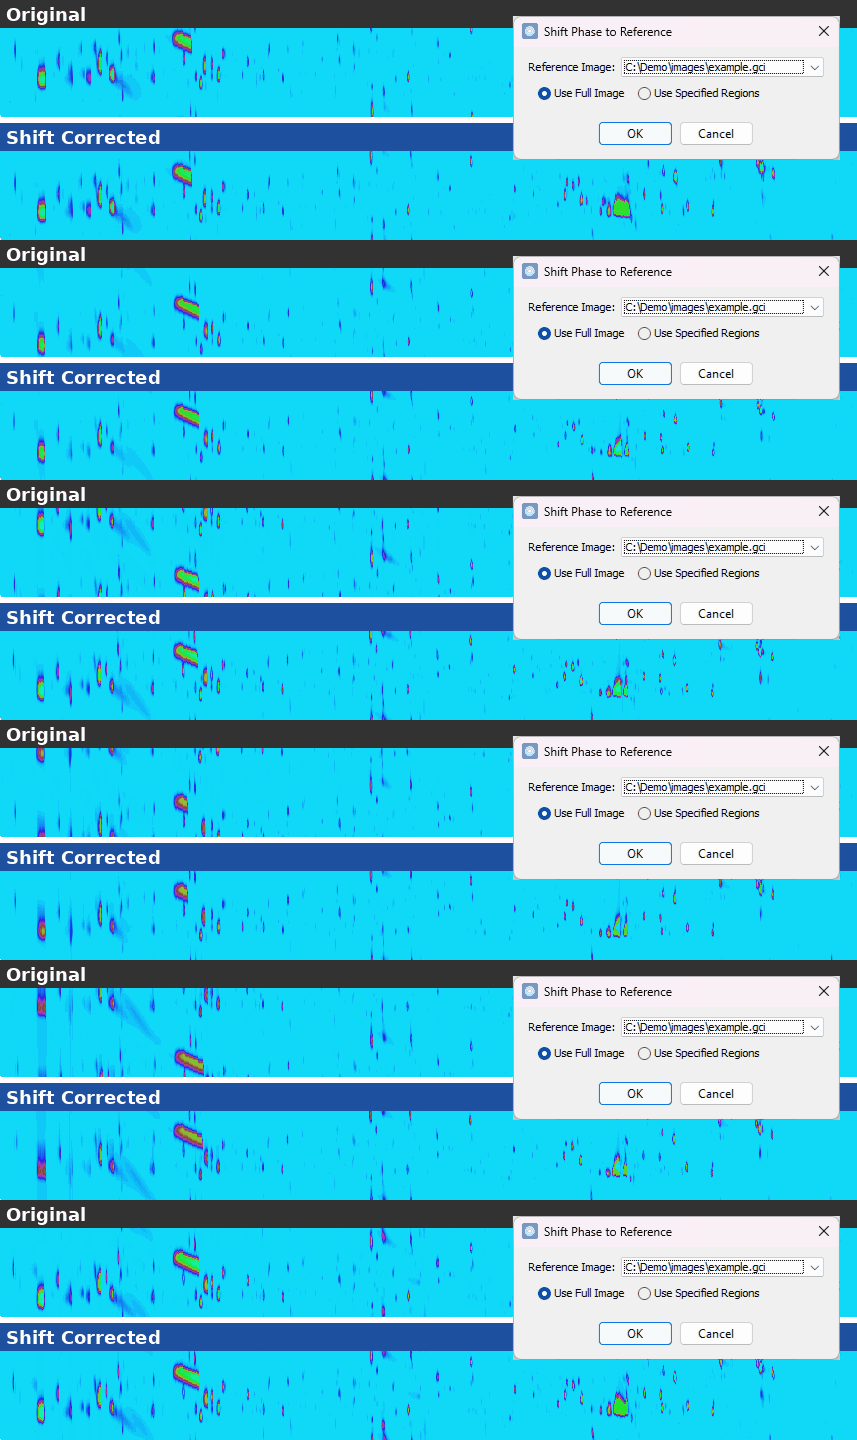
Phase shift offsets: Different runs may have different timing offsets or slightly varying chromatographic conditions, producing visible shifts and sometimes peak wrapping in the second dimension.
-
Retention time drift: Retention times vary from run to run because of system variations, such as pressure and temperature fluctuations, and because of column aging.
Key Enhancements
By comparing peak patterns against a reference image, these tools provide more reliable results even with significant retention-time drift or complex matrices:
-
Shift Phase to Reference: Automatically determines the phase shift needed to align an image to a reference image, then applies it. Match against the full reference image, or restrict the comparison to retention-time ranges or named graphical regions.
-
Match Using Reference: Matches template peaks to the current chromatogram based on the corresponding peak patterns in a reference image, for more reliable matching when retention times drift.
-
Guided Comparison: When a reliable result cannot be determined automatically, the software offers to open a comparison of the image against the reference so the alignment can be reviewed.
-
Automated Workflows: Both operations are also available as method commands, so they can be built into automated methods and run during import.
Example - Landmark Peak Matching for UOP 990
Info
Data set: a single distillate diesel sample run 20 times on the same GCxGC system over a short period of time.
Instruments: LECO GCxGC-FID system, Agilent 6890 GC, run in accordance with UOP 990.
This walkthrough applies a UOP 990 template with 91 landmark peaks and 138 groups across a set of 20 runs. A reference image is processed manually and used to build the template; each of the 20 runs is then aligned and matched to it automatically.
Step 1. Prepare the Reference Image and Capture a Preprocessing Method
Tip
Because both operations rely on visual similarity, choose a reference image that closely resembles the images being processed.
- Open the reference image, and process it manually: phase shift, baseline correction, and blob detection.
- Select Method > New Method from Current Image. The preprocessing steps just performed are captured automatically.
- Save the method, e.g. as
Preprocessing.method.
Step 2. Build the Reference Template
- With the reference image still open, identify the landmark peaks.
- Add any template graphics desired, such as group-area outlines.
- Open the Blob Table and confirm that each landmark peak has a unique Compound Name. A template peak can only be matched using a reference if it has a unique name within the template, and the reference image contains exactly one blob with that same name.
- Select all of the named landmark peaks and click Add to Template.
- Select Save > Save Template to save the template (
.btfile).
Step 3. Align and Match a New Run Manually
Before automating the workflow, it is worth confirming the two operations against one more run.
-
Open another raw run and select Method > Manage & Run Methods > choose
Preprocessing.method> Run to reproduce the same phase shift, baseline correction, and blob detection performed on the reference. -
Select Processing > Shift Phase to Reference, choose the Reference Image prepared in Step 1, and choose how it is matched:
- Use Full Image to match the entire reference image.
- Use Specified Regions to match one or more regions defined by retention-time ranges or named graphical regions. For this example, a Time Range region covering the full first-dimension separation but restricted to 0-1 seconds in the second dimension is used.
Click OK. The shift is determined and applied automatically. If a reliable shift cannot be found, accept the offer to open a comparison against the reference and review the alignment.
-
Select Template > Interactive Match and Transform, load the reference template saved in Step 2 (overwriting the active template), then click Match Using Reference and select the reference image. The software computes a match score for every landmark peak based on the corresponding peak patterns in the reference image. Review the match scores, then click Apply Template to transform the template onto the current chromatogram using the reference-based matches.
Note
Reference-based matches behave like any other peak matches - any landmark peaks not matched automatically can be assigned by hand, and matches can be reviewed, cleared, reassigned, and exported in the same way.
Step 4. Automate the Workflow with a Method
Once the workflow is verified, the same two operations can be added to a method so they run automatically.
- In Method > Manage & Run Methods, select
Preprocessing.methodand click Copy to create a new method, e.g.Preprocessing+Template.method. - Open the copy in the Method Editor and add the reference-matching steps from the Available Operations list:
- Shift Phase to Reference - the reference image and region from Step 3.
- Load Template - the
.btfile saved in Step 2. - Match Template Using Reference - the same reference image.
- Apply Template As-Is.
- Save the method.
Info
For convenience, the reference-matching steps used here can be downloaded as a method and imported into a method extracted from the reference image, instead of adding them by hand: Reference Matching Method In the Method Editor, click Import on the toolbar and select the downloaded method to add its steps, then specify the reference image for each imported step.
Step 5. Apply the Method
Run the completed method on another run in the set (Method > Manage & Run Methods > select Preprocessing+Template.method > Run) to confirm every step, including the reference-based shift and match, completes successfully.
Note
This example applies the method one run at a time to keep the video walkthroughs focused; it is not a requirement of the workflow.
The same method can also be applied to many runs at once - for example, using a project's Reprocess Images tool to batch-process every remaining run in the set - or during import.